How to Setup Oculus Quest 2 for Development in Unity Under 20 Minutes
Dejan Gajsek
Meta Quest 2 (previously known as Oculus Quest 2) is by far the most popular standalone virtual reality headset. At least that’s safe to say judging by the units sold compared to other VR headsets.
And it’s absolutely a great hardware to get you started in XR development since it offers a lot of features for a relatively affordable price. The downside is that it does require setting up a Facebook account which some users didn’t like due to privacy concerns.
In this guide, we’re going to learn how to set up the device for AR/VR development in Unity. You’ve bought the headset to develop apps instead of playing endless rounds of Beat Saber right? And yes you can play Half-Life: Alyx through SteamVR with pure untethered wireless glory too!
We’ve made this step-by-step guide to get you started as fast as possible, but you can always revert to Meta’s official setup process documentation: Oculus App Development in Unity
Contents
- Quest 2 Official Technical Requirements
- Quest 2 Setup for Development
- Oculus Link – Windows Only
- Working with Meta Quest on macOS
Quest 2 Official Technical Requirements
- At least a 2.0+ GHz processor and 2 GB system RAM
- You'll need Windows 10 (64-bit) or macOS Sierra 10.10 or higher (x86)
- macOS is supported with limited features
- The minimum supported Unity version is 2020.3 LTS
- Android Build Support module
- Android Software Development Kit (SDK) and Native Development Kit (NDK).
- OpenJDK.
To use Oculus Link (Windows only) that allows you to use Unity’s Play mode on Oculus Quest, you need to use Use Oculus Link with Meta Quest 2 or Meta Quest, and that has the following graphics card requirements (based on Rift S).
Quest 2 Setup for Development
Looking for a fast video tutorial? Our instructor Mitchell made this quick tutorial on how to start building for Quest 2 with Unity.
1. Setup the Quest Headset
- On your phone or tablet, download and install the Oculus mobile app for Android or iOS.
- Sign in with your developer account. *If you do not have one, sign up to be an Oculus developer.
- If it is the first time you sign in, follow the instructions to set up your VR profile.
- Pair your headset, and then follow the instructions to do the setup.
For detailed instructions read the official Getting started with your Meta Quest
2. Put the Quest in Developer Mode
- Once logged in, on the headset go to: Settings > System > Developer
- Turn on the USB Connection Dialog option.
- On your mobile app go to: Devices > Developer Mode
- Use the toggle to activate Developer Mode.
- Connect the headset to the computer using a USB-C cable.
3. Connect Quest and Unity
- Open the project in Unity.
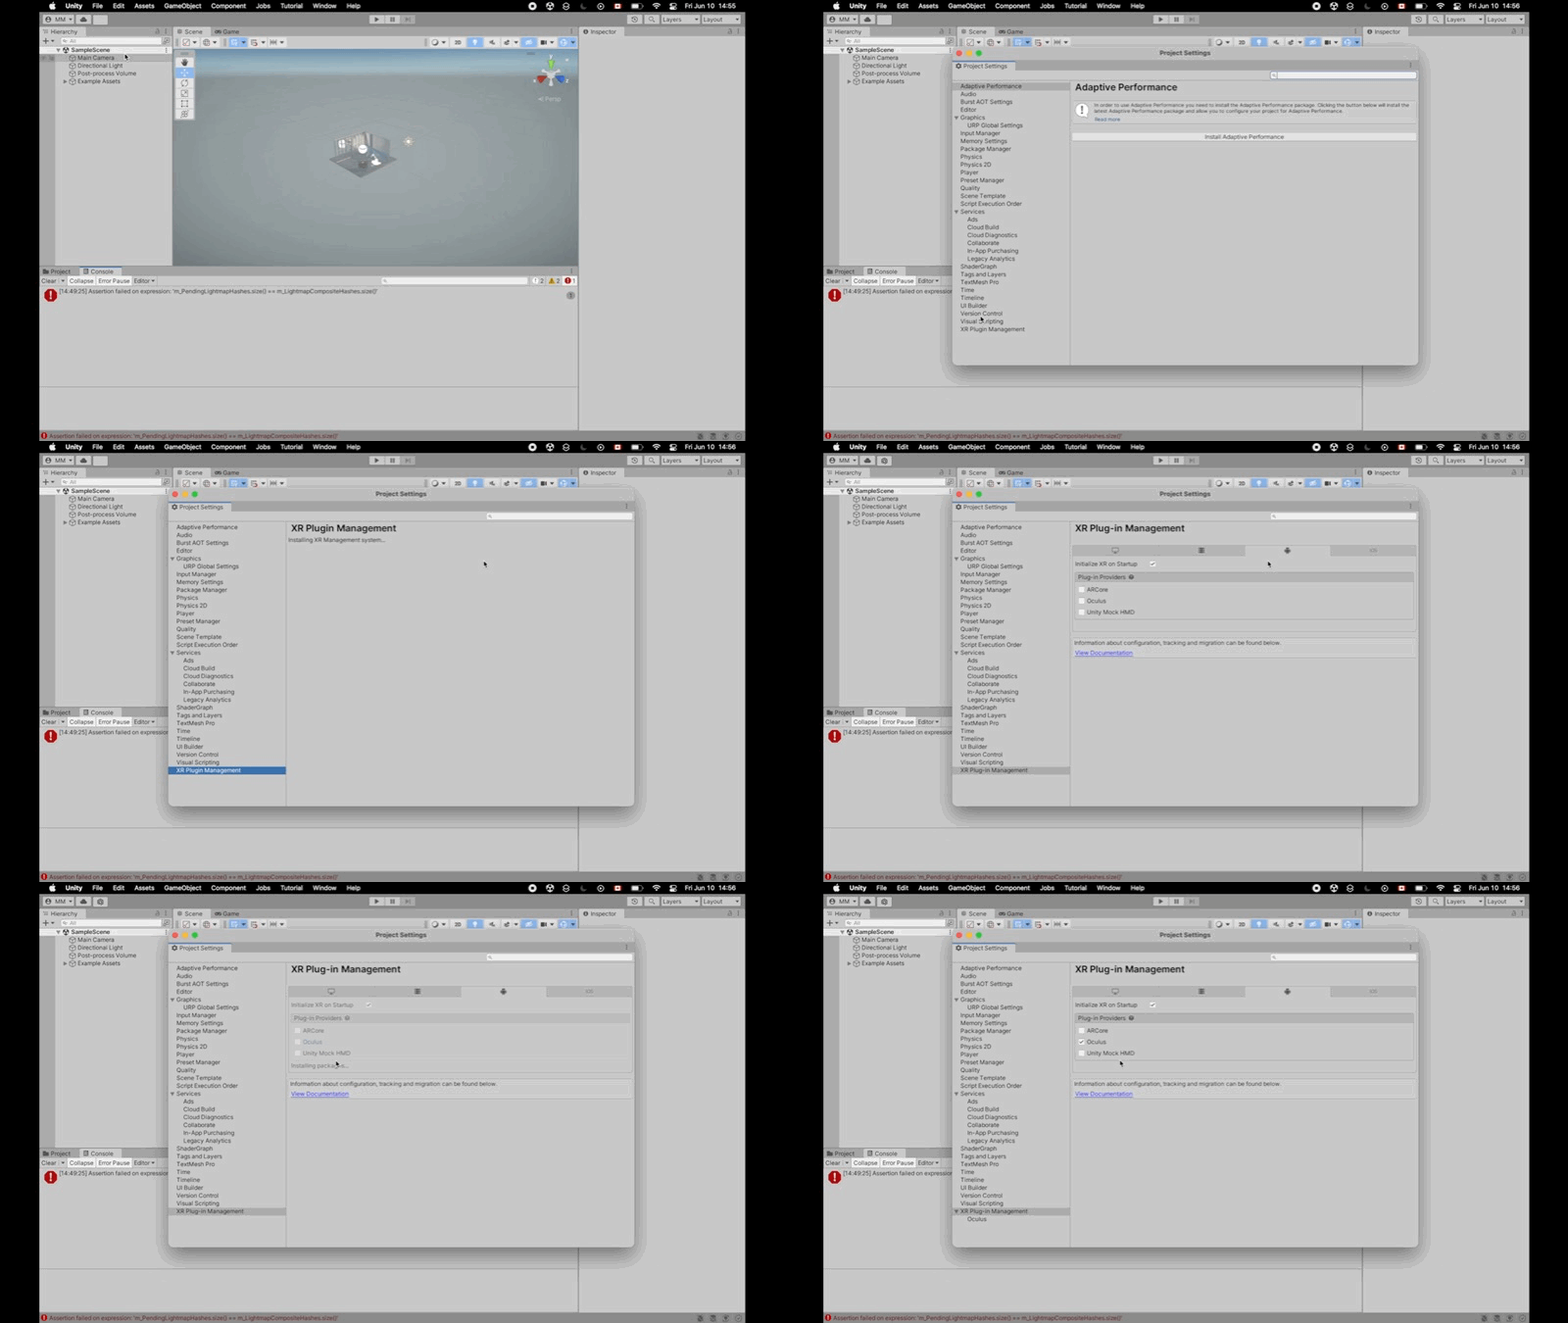
- Go to: Edit > Project Settings
- Select XR Plug-in Management.
- In the Android Settings tab, check Oculus.

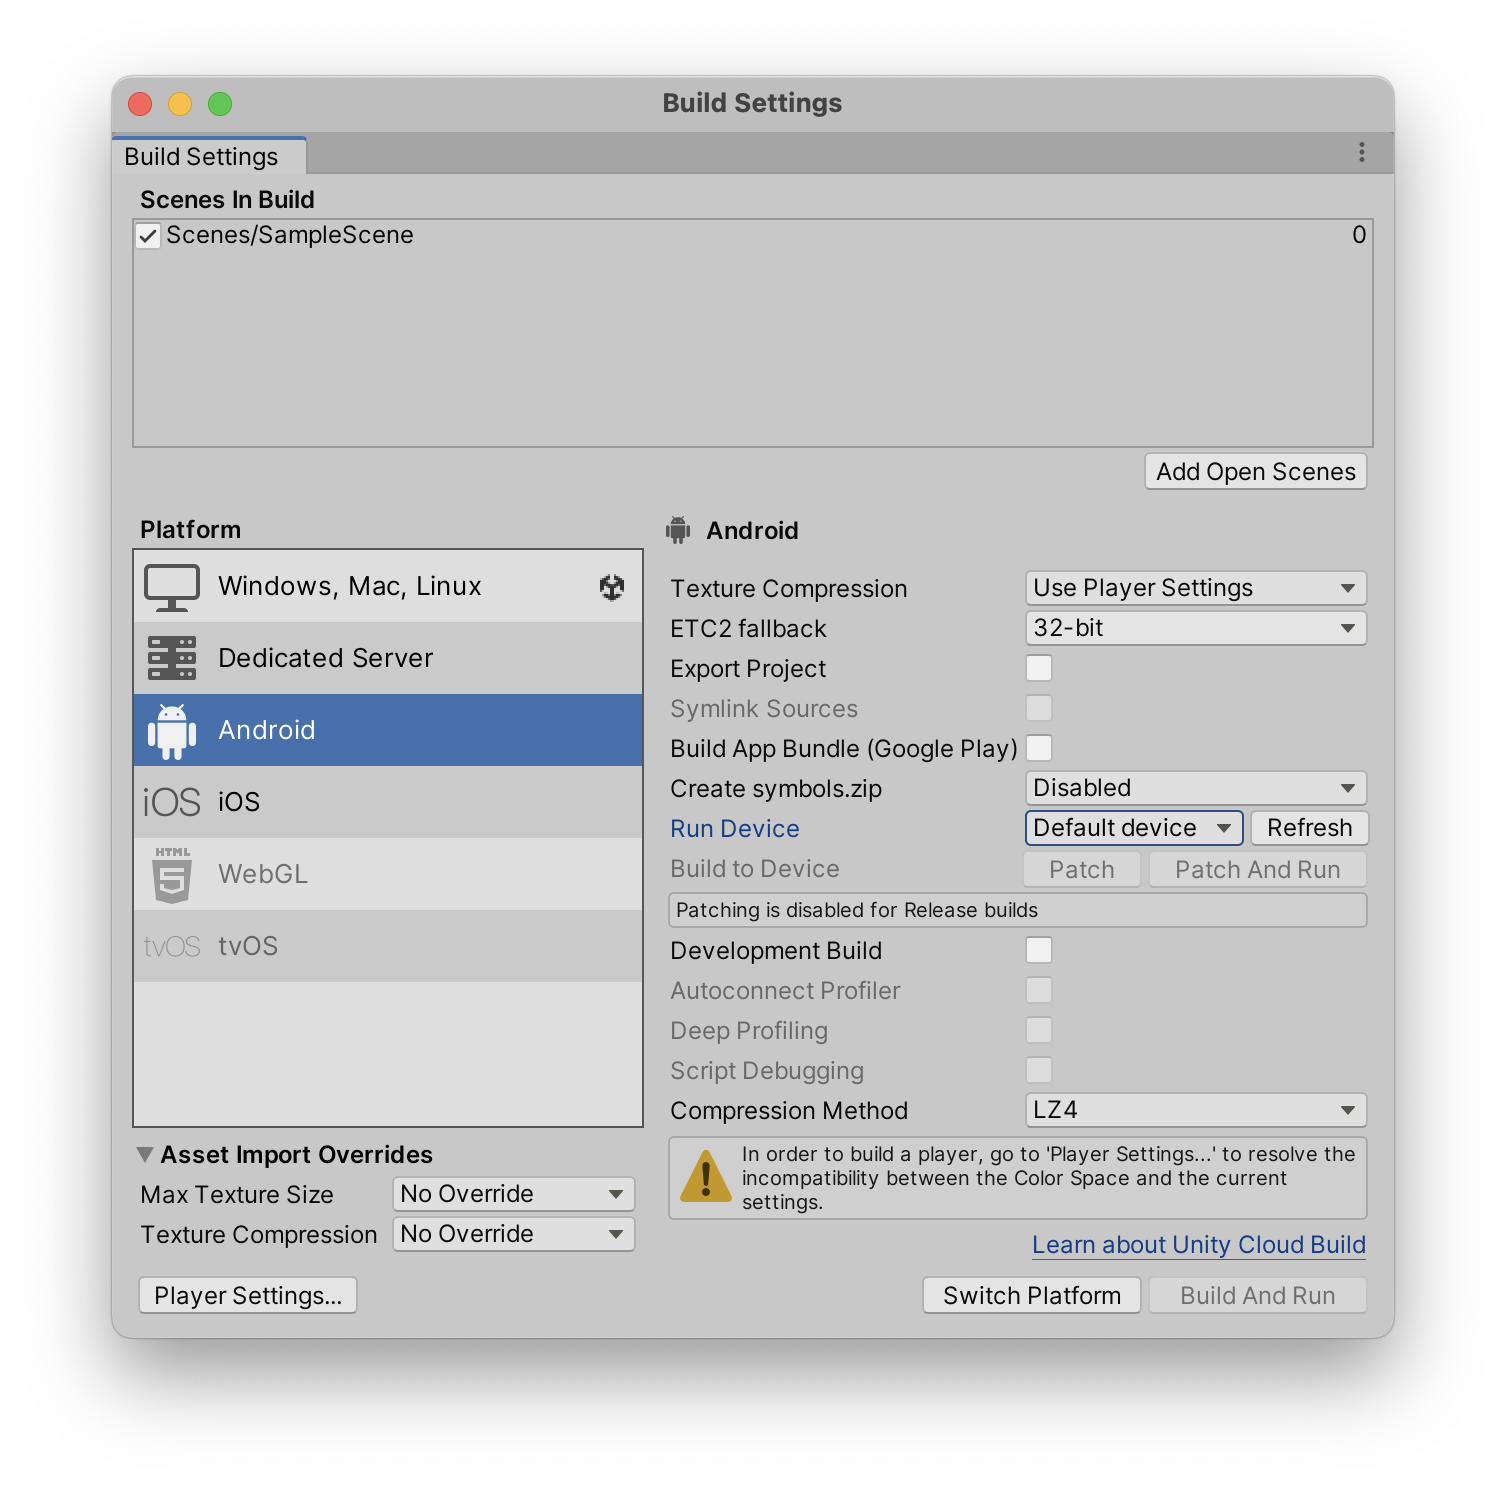
- Open: File > Build Settings
- Select Android and click on Switch Platform.
- In the Run Device list, pick your device. If your device is not there, make sure Developer Mode is enabled and then click on Refresh.
- Click on Build and Run.

Unity will compile your project and then it will push it to your headset.
Oculus Link – Windows Only
If you are developing your app on a computer with Windows, you can use Oculus Link. This method allows you to save time because you can preview your build using the Play button, without the need to build and run. This will save you a lot of time.
For Link, make sure your computer meets the recommended specifications, your computer and headset are updated, and your USB cable is of good quality.
1. Connect the Headset and the Windows PC
- Install the Oculus App for PC.
- Plug your headset into your computer using a good USB 3.0 cable. The good in that sentence means a cable long enough and with support for data and power transfer.
- Deny the Allow access to data prompt. If you select accept by accident, unplug the headset and plug it in again.
- Select Enable when you get the prompt to Enable Oculus Link.
If you are having issues, try restarting the headset and the computer, or check the Troubleshooting Tips and Known Issues website.
2. Setup Unity to Work with the Headset
- Open the project in Unity.
- Go to Edit > Project Settings
- Select XR Plug-in Management.
- In the Windows Settings tab, check Oculus
Working with Meta Quest on macOS
Meta Quest does work with macOS however you won’t get the real time VR preview. The main reason is that Oculus Link Cable / Air Link functionality does not work on macOS, which means that you will have to compile the APK each time you want to test your project. Annoying, but that’s why most developers use PC and Microsoft OS.
Download our Syllabus
Download XR Download XR Development with Unity Course Syllabus